How to Use Your Chili Cloud Sync Folder?
First Steps
Getting to Know Your Chili Cloud Sync Folder
The Chili Cloud sync folder is the place, where you can sync content between your Chili Cloud account and your local computer. You can also share this content with others.
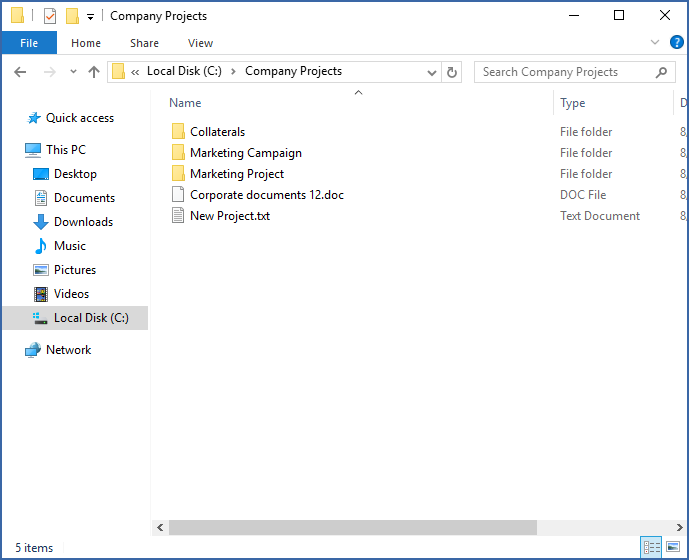
You created this folder during the configuration process in Initial Configuration. In this example, the folder is named Company Projects.
In the Company Projects folder:
1. Create a new folder named Marketing Campaign.
2. Create a text document, put some text in it, and then save it and close it.
3. Create another folder named Collaterals.
4. Paste some files or folders into this new folder.

Now it’s time to share a folder with another user — such as a colleague. You can do this directly from Windows File Explorer or by using your web browser.
Sharing a Folder in Windows File Explorer
If you want to share, for example, the Marketing Campaign folder, which is located in the Company projects folder:
1. Right-click on the Marketing Campaign folder.
2. In the context menu, select Share with Chili Cloud.
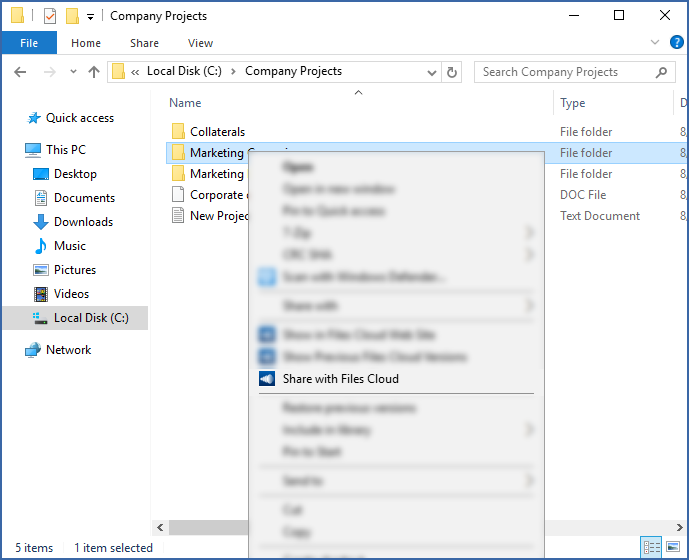
3. Your default web browser launches and shows you the Invite to dialogue box.
Note: You must be logged in to your Chili Cloud account. Otherwise, you will be prompted to log in, and you have to start the sharing process again.
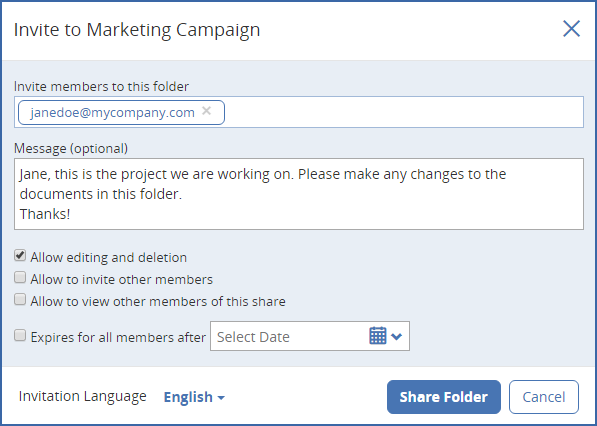
4. In the Invite to dialogue box, fill in the email address of the user with whom you wish to share this folder with, and then press Enter.
5. [Optional] Add an appropriate text message.
6. Configure the desired sharing options:
a. Allow editing and deletion — if this check box is selected, the invited user can edit and delete the files in the shared folder. If the check box is cleared, the invited user can only download and read files in the shared folder.
b. Allow to invite other members — if this check box is selected, the invited user can share this folder with other users.
c. Allow to view other members of this share — if this check box is selected, the invited user can see with whom the folder is already shared with.
d. Expires for all members after — if this check box is selected, you can set when all the invited users lose their access to the shared folder.
7. After selecting the desired check boxes, click on Share Folder.

After clicking Share Folder, a window will appear with a link that will be saved in the clipboard. Send this link to the person you would like to share the folder with.
The invited user is then prompted to create a guest account to access the contents of the folder.
Sharing a Folder by Using A Web Browser
1. Go to your Chili Cloud server address. For example, https://portal.chiliprotect.com
2. Log in to your Chili Cloud account using your e-mail address or username.
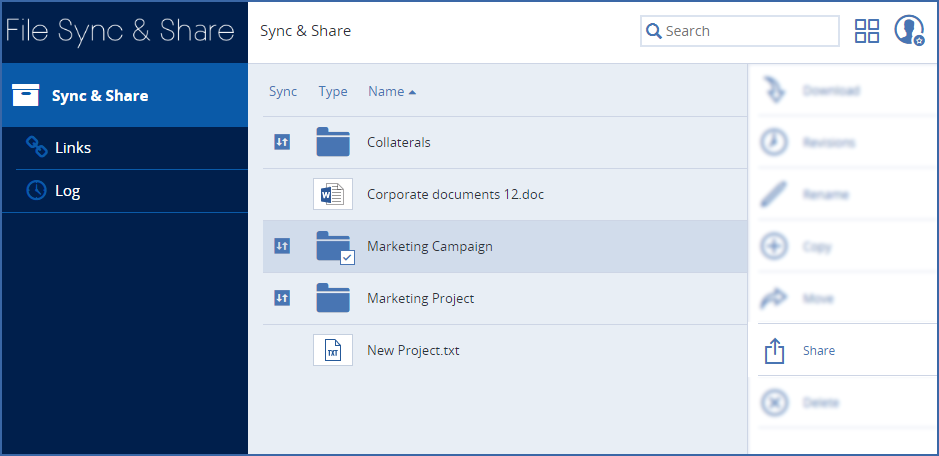
3. If you use more than one Acronis Cyber Cloud service, select File Sync & Share.
4. Hover over the desired folder and select the check box that appears on its icon. Then select Share in the sidebar. Alternatively, open the desired folder, and then select Share in the sidebar.
5. In the Invite to dialogue box that appears, fill in the e-mail address of the user with whom you want to share this folder, and then press Enter.
6. [Optional] Add an appropriate text message.
7. Configure the desired sharing options:
a. Allow editing and deletion — if this check box is selected, the invited user can edit and delete files in the shared folder. If the check box is cleared, the invited user can only download and read files in the shared folder.
b. Allow to invite other members — if this check box is selected, the invited user can share this folder with other users.
c. Allow to view other members of this share — if this check box is selected, the invited user can see with whom the folder is already shared with.
d. Expires for all members after — if this check box is selected, you can set when all the invited users will lose their access to the shared folder.
8. After selecting the desired check boxes, click on Share Folder.
After clicking Share Folder, a window will appear with a link that will be saved in the clipboard. Send this link to the person you would like to share the folder with.
The invited user is then prompted to create a guest account to access the contents of the folder.
Note: By using a web browser, you can also share single files. For more information on how to do this, refer to File and folder actions.
Note: The maximum path length is different in Mac OS X and Windows, which can lead to syncing errors in cross–platform deployments. In Windows, there is a limitation of 260 characters (MAX_PATH) for the entire path, including the "C:\mysharefolder\" part. So, in Windows the max filename length will be 260 - [share folder path length] - 1 (for NULL terminator). For example, the user is sharing C:\my_shared_documents and is trying to download a file into C:\my_shared_documents\this_is_a_folder\ the max file name length of that subdirectory would be 260 - 40 - 1 = 219 characters. The Mac OS X limit is 1024 characters.
Is There Anything Else That We Can Help You With? Then Read on Below:
- How to activate Chili Cloud?
- How to move your files from the old Chili Cloud to the new one!
- How to uninstall the old Chili Cloud from your device!
- How to update the Windows client?
- How to remove the Windows client?