Chili Cloud Help Guide
(Klik HER for den danske installationsguide / Click HERE for the Danish installation guide)
Activate Chili Cloud
1. Click Activate Account in the activation e-mail that you have received. If the e-mail is not in your inbox, then check the spam folder.
2. Log in to your Chili Cloud account on the page that opens.
3. Select the End User License Agreement and Privacy Statement check box, and then click Accept.
4. Fill in your account name if you have not already done so.
Before You Read on, Follow the Steps in the Links Below:
- How to move your files from the old Chili Cloud to the new one!
- How to uninstall the old Chili Cloud from your device!
Windows Client Installation
Using your web browser, go to the login page of your Chili Cloud server, or click here: https://portal.chiliprotect.com
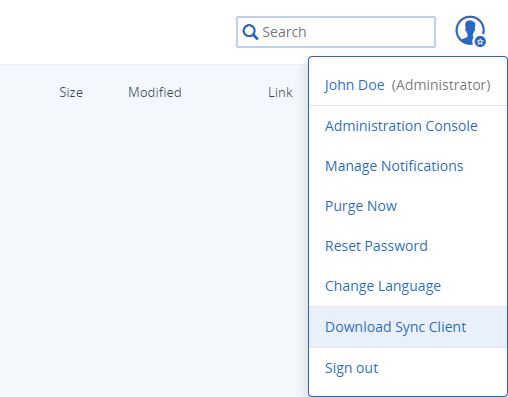
1. Log in using your e-mail address or username and click on your user icon.
2. Click the Download Sync Client link.
3. On the page that opens, click Desktop Sync Client for Windows and save the installer to your computer.
4. Run the Chili Cloud Client Installer. Ensure that you are logged in to Windows with administrator privileges.
a. Click Next to start the installation.
b. Accept the Software license agreement and click Next.
c. Click Next to accept the default installation folder, or choose a different one. The folder you select is the folder which contents will be stored on your Chili Cloud.
d. Click Install.
e. Click Finish to close the installer.
How to get started:
1. Go to Windows Start menu > All Programs, and then launch the Chili Cloud Client.
2. The Chili Cloud Preferences window will appear. If you want to open this window later, click on the Chili Cloud icon in the notification area of the window, and then click Preferences.

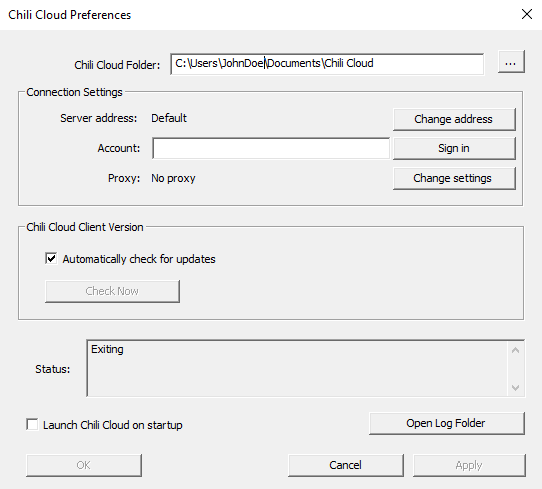
3. Click on the three dots next to the Chili Cloud Folder field, to specify where your files will be synced. Everyting that you put into this folder will be saved on your Chili Cloud.
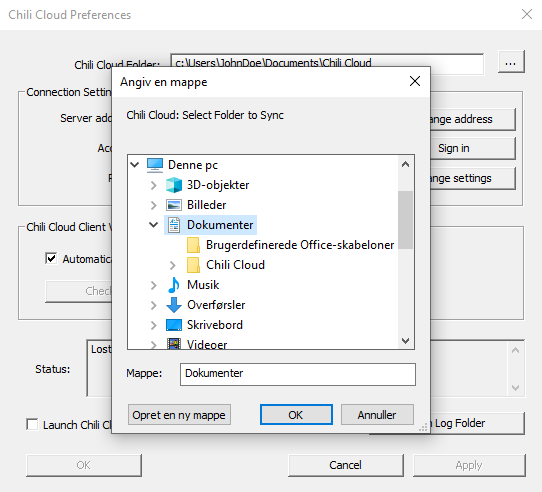
Above, we have created and selected a folder named Chili Cloud. If you want to transfer your files from another cloud to this one, transfer the files to the folder you have selected on your PC. This way you can ensure that your files are transferred to your Chili Cloud. In our case, we have to transfer our files to the folder named Chili Cloud, in order to put the files into our cloud.
4. If you are not already signed in, then enter your e-mail adress/username and click Sign In. In the browser window that opens, enter your e-mail address or username. Then, enter your password.
If you have received an invitation email and you set your own personalized password in Chili Cloud, this is the one to use.
5. Click OK to save your settings.
Note: When reinstalling the Desktop client, always choose a new Chili Cloud sync folder in order to prevent any synchronization issues or conflicting files.
Video Guide:
Is There Anything Else that You Want to Know More About? Then Read on Below:
- How to use your Chili Cloud sync folder?
- How to update the Windows client?
- How to remove the Windows client?
- Proxy configuration